Delectable Maple Donut Recipe for National Donut Day

Did you realize there is a National Doughnut Day?

I thought it was just another one of those strange days where they honor something just because.

But it actually started back in 1938 as a tribute to the Salvation Army volunteers who served doughnuts to soldiers on the front lines of World War I.

Their mission was to provide comforting meals to the troops.

Donuts were their solution.

They were cooking in very dire circumstances, using war helmets as their pot to fry up to seven donuts at a time.

Now we celebrate these brave volunteers who were known as “donut lassies” on the first Friday of June every year.

Courtesy of Flickr.com

Now, I’m curious about the reasonings behind other National days.

May have to do some investigating.

So what are you waiting for?

Enjoy a donut, or maybe two for the day in honor of the donut lassies.

Better yet, bake your own right at home.

My family loves these Maple Bars.

Only we tend to switch it up and make chocolate icing instead.

It’s the most delicious breakfast paired with our pasture raised pork bacon.

Click HERE to get some for yourself!

MMMMMmmmm…!

MAPLE BARS

yield: 1 DOZEN  prep time: 1 HOUR  bake  time: 7-8 MINUTES   total time: 1 HR 15 MINUTES

INGREDIENTS:

  • 1 ½ cups milk
  • 1/3 cup butter
  • 4 tablespoons sugar
  • 2 teaspoons slat
  • 2 teaspoons cinnamon
  • ½ cup water
  • 2 (1/4 oz) packages yeast
  • 2 large eggs, beaten
  • 5 cups flour

Maple Icing

  • ½ cup butter
  • 1 cup packed brown sugar
  • ¼ cup milk
  • 1 ½ cups powdered sugar
  • 2 teaspoons maple syrup

DIRECTIONS:

For Maple Bars:

  1. Preheat oven in warm mode, or 170 degrees F.
  2. In a microwaveable bowl, melt butter. 
  3. Add milk, sugar, salt and cinnamon to butter. Microwave until very warm, about 1 minute 30 seconds.
  4. Add yeast and beaten eggs to milk mixture.
  5. In a stand mixer, add half of the flour and milk mixture.
  6. Beat on medium/low until smooth.
  7. Add remaining flour.
  8. Dough will be very soft.
  9. Turn onto floured surface and knead in enough flour to make it smooth.
  10. With a rolling pin, roll into a ½ inch thick rectangle.
  11. Cut into squares and let rise on lightly greased baking sheets in warmed oven for 20 minutes.
  12. Preheat oven to 425 degrees F.
  13. Bake bars for 7-8 minutes or until light golden brown.

For Icing:

  1. While bars are rising, in a saucepan bring butter, brown sugar and milk to a boil.
  2. Let simmer for 3 minutes.
  3. Remove from heat and cool for 10 minutes.
  4. Add maple syrup and then powdered sugar and blend well.
  5. You can then either spread on maple bars, or I like to dip the top side of the bars in the icing.

If you have chocoholics in the family.  Try the chocolate icing.

Chocolate Icing:

  • ½ cup butter
  • ¼ cup milk
  • 2 teaspoons vanilla
  • ½ cup semi-sweet chocolate chips
  • 2 cups powdered sugar
  • While bars are rising, in a saucepan bring butter and milk to a boil.
  • Let simmer for 3 minutes.
  • Add chocolate chips.
  • Remove from heat and cool for 5 minutes.
  • Add vanilla and then powdered sugar and blend well.
  • You can then either spread on maple bars, or I like to dip the top side of the bars in the icing.

Adapted from Food.com

GET MORE RECIPES

Have you been wanting to hang with your friends-play some games, but not sure what to feed them?

We’ve got your back!

Try these GAME NIGHT GRUB recipes!
Keep them fueled for when the competition gets fierce!

Processing…
Success! You're on the list.

5 Amazing Parks You Should Make the Detour to Visit in Oregon

Isn’t it odd that for many of us, we can live in the same state for most of our life, yet never visit the parks that are right outside our back door.

I mean seriously, we’ll travel hundreds of miles to other states to visit their national parks, but never our own.

Or if you’re like me, I travel across the state almost monthly delivering pork, but am always in a rush to get from one point to the next and back home again.

I steal glances of these natural wonders as I drive by, probably making the cars behind me nervous as I swerve all over the road, wishing I would have put the time in my schedule to stop.

We lived in Alaska for 17 years and never took the time to really travel the state until the last two years when we knew we’d be moving soon. 

There is SO much I still wish I could go back and see.

Yet, here I am living in Oregon again, and of the top 5 parks in Oregon to see, I haven’t even been to half of them.

No surprise, Crater Lake is number one!

I’ve drove right by the entrance of this park twice in the last two years and have never took the time to stop.

Crater Lake is on my bucket list.

Photo courtesy of TripAdviosr

Crater Lake was formed when Mount Mazama blew its top. 

The caldera left by the volcano erupting is filled with a deep blue, clear water making it the deepest lake in the United States. 

There are several hiking trails at Crater Lake National Park and they suggest giving yourself at least 3 hours to really enjoy the park.

Did you know it’s Oregon’s only National Park?

Me, niether!

Next, it’s the Oregon Dunes National Recreation Area.

The Oregon dunes make up about a forty-mile recreational area that runs along the Oregon coast.

It’s one of the largest areas of temperate coastal and dunes in the world, with the forests and ocean all together in such close proximity.

There are thirty lakes in this forty-mile area.

I imagine you could spend a week on the coast and still not see it all!

How about number three, Deschutes National Forest.

Photo courtesy of TripAdviosr

Thinking back, I have seen a lot more of Deschutes National Forest than I originally thought.

There are dozens of lakes, lava fields and hiking/biking trails with some amazing views of the Cascade mountains.

Suttle Lake was one of my favorite places to go swimming in the summer.  

There was a HUGE floating log that made for the best dock to jump from in the middle of the lake.  

You’d get several kids pushing the thing around the lake.

Ever been spelunking?

Yes!  It’s really a word. LOL!

Yah, I’d never heard of it before either until my Mom said it when we were exploring some caves out here in Princeton.

Spelunking: the exploration of caves, especially as a hobby (Oxford Dictionaries)

Oregon Caves National Monument and Preserve is number 4.

Photo courtesy of TripAdviosr

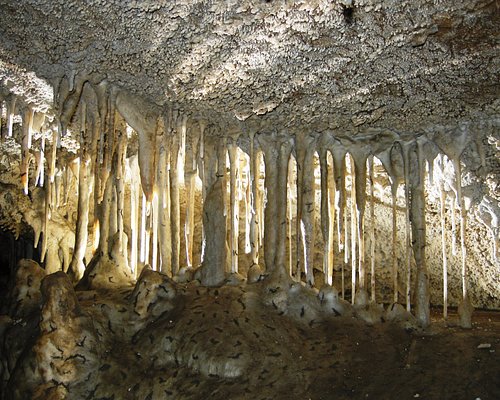
You get to wander through narrow, twisting underground passages enjoying all the strangely beautiful stalactites and stalagmites.

Make sure you pack a sweatshirt.

The cave is a chilly 44 degrees year round!  Perfect place to visit on a hot day to cool off!

And number 5, the John Day Fossil Beds National Monument.

When I was in the 5th grade, our school took us up to Camp Hancock. 

I don’t know if it even exists anymore. 

We spent three or four days out there exploring the trails and finding our own fossils.

Now, I drive through the area once a year when I make a run to Thomas Orchards in Kimberley to get buy peaches, pears and cherries.

The hills at John Day Fossil Park are "alive" with color.

Make sure you have a full tank of gas and plenty of water as refill spots are scarce.

There are plenty of trails of varying lengths that you can hike.

You’re gonna want to plan a whole day out here exploring, plus travel time to get to the area.

Plan some time and go!

Have you visited any of these places?

Comment or send me a message and let me know.

I’d love to hear what you thought of them!

DON’T MISS OUT!

We want to help you enjoy life and great food!

Sign up below and we will make sure you have the tools to do so!

Processing…
Success! You're on the list.

Porktastic Flavor Grilling Recipes

Some of my best memories are camping with family and friends.

Memorial weekend is usually the first opportunity for us to pull out the grill.

When we lived in Alaska, it was our first campout of the year as well.

Now that we are in Oregon, it’s our first big get-together with the family.

With summer just around the corner, I thought I’d share with you some of our favorite grilled pork recipes.

  • Grilled Pork Tenderloins
  • BBQ Teriyaki Pork Kabobs
  • Potluck Spare Ribs
  • Grilled Pork with Avocado Salsa

And of course you can’t forget a little dessert!

  • Blueberry Grunt

Let us know what you think! I’d love try some of your favorite grilling recipes.

GRILLED PORK TENDERLOINS

yield:  8 SERVINGS  prep time: 10 MINUTES  grill  time: 20 MINUTES   total time: 30 MIN + MARINATING

INGREDIENTS:

  • 1/3 cup honey
  • 1/3 cup reduced-sodium soy sauce
  • 1/3 cup teriyaki sauce
  • 3 tablespoons brown sugar
  • 1 tablespoon minced fresh gingerroot
  • 3 garlic cloves, minced
  • 4 teaspoons ketchup
  • 1/2 teaspoon onion powder
  • 1/2 teaspoon ground cinnamon
  • 1/4 teaspoon cayenne pepper
  • 2 Rural Roots Ranch pork tenderloins (about 1 pound each)
  • Hot cooked rice

DIRECTIONS:

  1. In a large bowl, combine the first 10 ingredients.
  2. Pour half of the marinade into a bowl or shallow dish; add tenderloins and turn to coat.
  3. Cover and refrigerate 8 hours or overnight, turning pork occasionally. Cover and refrigerate remaining marinade.
  4. Drain pork, discarding marinade.
  5. Grill, covered, over indirect medium-hot heat for 20-35 minutes or until a thermometer reads 145°, turning occasionally and basting with reserved marinade.
  6. Let stand 5 minutes before slicing.
  7. Serve with rice.

Can you freeze Grilled Pork Tenderloins?

Freeze uncooked pork in a freezer container with marinade. Transfer reserved marinade to a freezer container; freeze. To use, completely thaw tenderloins and marinade in refrigerator. Grill as directed.

GRILLED PORK TENDERLOIN TIPS 

How long do you grill pork loin per pound?

Most pork tenderloins are around 1 to 1-1/2 pounds and take about 15 minutes to cook. This recipe calls for two tenderloins, which means the cooking time will be anywhere from 20 to 35 minutes. Use a meat thermometer to test for doneness—the meat’s internal temperature should be 145° when fully cooked. 

What is the difference between a pork loin and a pork tenderloin?

The loin refers to a large portion of back meat that can be sold in a large, flat slab. The tenderloin is a small, tender, cylindrical portion within the loin

How do you keep pork loin from drying out?

Keep in mind that for pork, pink does not mean raw, so avoid the impulse to overcook it. Once the meat’s internal temperature hits 145°, you can stop cooking.

Adapted from Taste of Home

BBQ TERIYAKI PORK KABOBS

yield:  6 SERVINGS  prep time: 30 MINUTES  grill time: 20 MINUTES   total time: 3 HRS 30 MIN (includes marinating)

A simple way to make kabobs for summer grilling, and easily adaptable to add your favorite veggies. Great with rice and a nice salad!

INGREDIENTS:

  • 3 tablespoons soy sauce 
  • 3 tablespoons olive oil
  • 1 clove garlic, minced
  • ½ teaspoon crushed red pepper flakes
  • salt and pepper to taste
  • 1 pound Rural Roots Ranch boneless pork loin, cut into 1 inch cubes
  • 1 (14.5 ounce) can low-sodium beef broth
  • 2 tablespoons cornstarch
  • 2 tablespoons soy
  • 1 tablespoon brown sugar
  • 2 cloves garlic, minced
  • ¼ teaspoon ground ginger
  • 3 portobello mushrooms, cut into quarters
  • 1 large red onion, cut into 12
  • 12 cherry tomatoes
  • 12 bite-size chunks fresh pineapple

DIRECTIONS:

  1. In a shallow dish, mix together 3 tablespoons soy sauce, olive oil, 1 clove minced garlic, red pepper flakes, salt, and pepper.
  2. Add pork cubes, and turn to coat evenly with marinade. Cover, and refrigerate for 3 hours.
  3. In a saucepan, combine beef broth, cornstarch, 2 tablespoons soy sauce, brown sugar, 2 cloves minced garlic, and ginger.
  4. Bring to a boil, stirring constantly. Reduce heat, and simmer 5 minutes.
  5. Preheat an outdoor grill for high heat and lightly oil grate.
  6. Thread pork cubes onto skewers, alternating with mushrooms, onion, tomatoes, and pineapple chunks.
  7. Cook on grill for 15 minutes, or until meat is cooked through.
  8. Turn skewers, and baste often with sauce during cooking.

Adapted from Taste of Home

POTLUCK SPARERIBS

yield:  12 SERVINGS  prep time: 10 MINUTES  grill  time: 1 HR 45 MINS  total time: 2 HOURS

INGREDIENTS:

  • 6 pounds Rural Roots Ranch pork spareribs
  • 1-1/2 cups ketchup
  • 3/4 cup packed brown sugar
  • 1/2 cup white vinegar
  • 1/2 cup honey
  • 1/3 cup soy sauce
  • 1-1/2 teaspoons ground ginger
  • 1 teaspoon salt
  • 3/4 teaspoon ground mustard
  • 1/2 teaspoon garlic powder
  • 1/4 teaspoon pepper

DIRECTIONS:

  1. Cut ribs into serving-sized pieces; place with the meaty side up on racks. in 2 greased 13×9-in. baking pans.
  2. Cover tightly with foil. Bake at 350° for 1-1/4 hours or until meat is tender.
  3. Remove racks; drain and return ribs to pans.
  4. Combine the remaining ingredients; pour over ribs.
  5. Bake, uncovered, for 30-40 minutes or until sauce coats ribs, basting occasionally.
  6. Ribs can also be grilled over medium-hot heat for the last 30-40 minutes instead of baking.

Adapted from Taste of Home

GRILLED PORK W/ AVOCADO SALSA

yield:  6 SERVINGS  prep time: 25 MINUTES grill  time: 25 MINUTES   total time: 50 MINUTES + MARINATING

The cumin, avocado and jalapeno give it southwestern flair. It’s an easy, elegant way to prepare pork.

INGREDIENTS:

  • 1/2 cup chopped sweet onion
  • 1/2 cup lime juice
  • 1/4 cup finely chopped seeded jalapeno peppers
  • 2 tablespoons olive oil
  • 4 teaspoons ground cumin
  • 1-1/2 pounds Rural Roots Ranch pork tenderloin, cut into 3/4-inch slices
  • 3 tablespoons jalapeno pepper jelly

Salsa:

  • 2 medium ripe avocados, peeled and chopped
  • 1 small cucumber, seeded and chopped
  • 2 plum tomatoes, seeded and chopped
  • 2 green onions, chopped
  • 2 tablespoons minced fresh cilantro
  • 1 tablespoon honey
  • 1/4 teaspoon salt
  • 1/4 teaspoon pepper

DIRECTIONS:

  1. For marinade, mix first 5 ingredients.
  2. In a large bowl, toss pork with 1/2 cup marinade; refrigerate, covered, up to 2 hours.
  3. For glaze, place jelly and 1/3 cup of the remaining marinade in a small saucepan; bring to a boil.
  4. Cook and stir until slightly thickened, 1-2 minutes; remove from heat.
  5. Place salsa ingredients in a large bowl; toss lightly with remaining marinade.
  6. Drain pork, discarding marinade.
  7. Place pork on a lightly oiled grill rack over medium heat.
  8. Grill, covered, until a thermometer reads 145°, 4-5 minutes per side, brushing with glaze during the last 3 minutes.
  9. Serve with salsa.

Adapted from Taste of Home

Have you ever heard of a a grunt? As in a dessert?

I never had.

Well…grunts, also called slumps, are just like cobblers except the grunt’s biscuits are steamed on the stovetop, almost like a dumpling.

They’re called grunts because of the sound the dessert makes as the fruit bubbles up during cooking. Or slumps for the way the biscuits slump down when served.

Grunts are great for cooking over a campfire.

BLUEBERRY GRUNT

yield:  6 SERVINGS  prep time: 15 MINUTES  grill  time: 20 MINUTES   total time: 35 MINUTES

This is wonderful served with a scoop of ice cream on top!

INGREDIENTS:

For the Fruit:

  • 4 cups blueberries
  • 1/4 cup light brown sugar
  • 2 teaspoons lemon zest
  • 2 tablespoons freshly squeezed lemon juice
  • 1/2 teaspoon ground cinnamon
  • 1 pinch salt

For the Dumplings:

  • 2 cups all-purpose flour
  • 1/4 cup granulated sugar
  • 2 teaspoons baking powder
  • 1 teaspoon salt
  • 4 tablespoons unsalted butter
  • 1 cup buttermilk
  • Vanilla ice cream, for topping

DIRECTIONS:

  1. Add the blueberries, sugar, lemon zest, lemon juice, cinnamon and salt to a large skillet or braiser with a tight-fitting lid.
  2. Stir to combine and cook over low heat for about 5 minutes.
  3. Combine the flour, sugar, baking powder and salt in a large bowl.
  4. Cut in the chilled butter with a pastry cutter or fork. Note that you can also grate the butter on a large box grater.
  5. Gently work the butter into the flour mixture and stir in the buttermilk.
  6. Drop the biscuit dough, using an ice cream scoop, onto the hot blueberry mixture.
  7. Cover and cook on low heat for about 15 minutes until the biscuits are done.
  8. Serve with vanilla ice cream.

Adapted from Spruce Eats by Anita Schecter

GET QUICK & EASY RECIPES

We want to help get dinner on the table quick and easily.

Share you’re email and we’ll put recipes in your inbox.

Processing…
Success! You're on the list.

It’s Not the “Other White Meat.”

4 Reasons Why Pastured Pork Should Be on Your Plate.

So how is your pork different than what I get at the grocery store? Pork is pork, right?

What makes it so special?

Why would I pay your price when I can get it SO much cheaper?

These are all questions I’ve been asked.

Pasture pork and the pork you get at the grocery store are like two completely different products, but called the same name.

Not sure if you believe me? 

Take a look at the 4 reasons we believe pastured pork should be on your plate.

#1 Taste:

  • When the pigs get to spend their days with their snouts in the grass, nibbling on roots and insects, their diet gives the pork a richer taste.
  • Deep marbling and red color are the key to flavor! This marbling throughout the muscles keeps the meat from becoming dry.
  • Just add a little salt and pepper and throw it on the grill.  Pastured pork can compete with any steak!

By contrast, pork you will find in the grocery store is grey, dry, and tasteless.  Have you ever noticed most pork recipes call for a number of seasonings or a sauce?  This is to add flavor to the pork which is lacking its own.

 #2 Quality of Life:

  • Pastured Pigs get to enjoy a life outdoors frolicking in the field and playing in the wallow.
  • They are resilient and healthy animals due to the access to clean air and exercise.
  • Pigs are social animals and having their social needs met, makes happier animals, thus higher quality meat.

Did you know that 95% of pigs in America are raised on factor farms, living their entire life inside metal buildings, on concrete floors, never once stepping foot outside?

Imagine 200 people crammed together in a bus verse a football field.

This leads to the use of antibiotics routinely to keep these animals healthy.

#3 Nutrient Rich:

  • Pastured Pigs meat and fat are rich in micronutrients.
  • High in Omega 3’s, fatty acids and vitamin D.
  • They produce monounsaturated fat, or the heart healthy fat.  The same fat found in avocado and olive oil.
  • Pigs in Sunshine are like humans and make vitamin D.
  • Pasture raised pork also contains Conjugated linoleic Acid (CLA) which has been found to promote weight loss and burn fat cells as well as reduce appetite.

The healthfulness of food has declined overtime due to industrialization. Efficiency, profit and convenience rather than flavor and nutrition are the goals.

#4 Better for the Environment:

  • Small farms raising pigs on pastures are improving their soil and the land. 
  • Grazing wastes build up the soil.
  • Traditionally farms raise heritage breeds suited for their pastures, preserving the breed and ensuring biodiversity.

Pigs raised in confinement can potential cause a hazard due to the large amount of contaminates.

Now you’ve seen the difference between pastured pork vs commercial or grocery store pork.

  • Deep rich flavor vs mild
  • Where and how it is raised
  • High in Omega 3’s vs antibiotics
  • Benefits the environment vs potential hazard

SO why the big price difference?

Why is the pork from the grocery store so cheap?

A commercial sow can produce up to 30 piglets per year.  Which then grow out in 6 months. They are confined to small spaces. Requiring less labor.

A pasture or heritage sow typically only produces about 16 pigs per year, which take 9-12 months to grow. Pasture pigs are routinely moved, adding man hours.

Buying in bulk is convenient.  Why run to the store weekly for meat if you don’t have to?  

Don’t have much freezer space?  We have pastured pork share sizes to fit most any freezer and budget.

And as a gift, here is my SUPER SIMPLE ROAST recipe.

SUPER SIMPLE ROAST

yield:  4-6 SERVINGS  prep time: 5 MINUTES  cook time: 4-6 HOURS   total time: 6 HOURS

INGREDIENTS:

  • 2-3 lb Rural Roots Ranch Pork Roast
  • 1 tablespoon garlic salt
  • 1 tablespoon onion powder
  • 1 teaspoon pepper

DIRECTIONS:

  1. Place the thawed, room temperature roast in the crock pot.
  2. The side with the most fat should be up to allow all the juices to distribute through the meat.
  3. Sprinkle the garlic salt, onion powder and pepper over the surface of the roast.
  4. If the lid of your crock pot does not seal, place a sheet of tinfoil between the crock and the lid to help hold in the moisture.
  5. Cook on low for 4-6 hours.
  6. Turn off crock pot.
  7. Allow roast to rest in juices for 10-15 minutes.
  8. Cut and Serve!

GET QUICK & EASY RECIPES

We want to help get dinner on the table quick and easily.

Share you’re email and we’ll put recipes in your inbox.

Processing…
Success! You're on the list.

2 Tasty Pork Recipes and Something for a Sweet Tooth

A couple times a year I get the urge to purge.

We’ve never really accumulated a lot of useless things.

Moving every 2-3 years and restricted to a weight limit when moving our personal things in the military really helped.

We’ve been living on the farm 4 years in May.  This is the longest we’ve ever lived in one home.

When I left home, my folks gifted me a cookbook with all our favorite family recipes.

A few of them are 4-H cooking contest winners.

And for the last 20 years, I’ve been adding to it.  Mostly stuffing the recipes in it.

Over the last couple weeks, I’ve misplaced my kids’ favorite coffee cake and cheesy bread stick recipes.

I’ve scoured the internet and can not find the same coffee cake recipe.

I’m really heart broken over that one.  Not as sad as my taste buds.  Though my pants may like me better.  LOL!

I’d finally had enough.

I sat down at the table and pulled everything out.

Making a trash pile of recipes we didn’t really like or I hadn’t made in years.

And a keep pile of our favorites and family staples.

Then finally sorting them out in the right categories in my book.

I should have done this years ago!  It would have saved me time and frustration.

My goal has been to create a cookbook for my nieces, nephews and my own kids as they graduate from high school.

The first graduates next month!  I may be burning the midnight oil to get it accomplished.

My goal is also to share a couple times a month with you!

There is nothing more frustrating than trying a new recipe to find you don’t like it.  

I find when I search the internet for a recipe, I tend to stick to those by Betty Crocker or Taste of Home.  

It seems you can’t really go wrong with one of their recipes.

So take a minute, and check out a few of our favorites.  You won’t be disappointed!

SAN FRANCISCO PORK CHOPS

yield:  4 SERVINGS  prep time: 15 MINUTES  cook time: 45 MINUTES   total time: 1 HOUR

Tender chops in a delicious sauce are great over noodles or thin spaghetti.

INGREDIENTS:

  • 1 tablespoon vegetable oil
  • 4 Rural Roots Ranch (3/4 inch-thick) boneless pork chops
  • 1 clove garlic, minced
  • ⅓  cup beef broth
  • 2 tablespoons cup soy sauce
  • 2 tablespoons brown sugar
  • 2 teaspoons vegetable oil
  • ¼ teaspoon red pepper flakes
  • 2 teaspoons cornstarch
  • 2 tablespoons water

DIRECTIONS:

  1. Heat 1 tablespoon vegetable oil in a skillet over medium heat. 
  2. Brown chops in hot oil, about 5 minutes per side.
  3. Remove pork to a plate, reserving the oil in the skillet.
  4. Cook and stir garlic in reserved drippings until fragrant, about 1 minute.
  5. Whisk beef broth, soy sauce, brown sugar, 2 teaspoons vegetable oil, and red pepper flakes in a bowl, dissolving brown sugar.
  6. Return pork chops to skillet and pour soy sauce mixture over the chops.
  7. Bring sauce to a boil, cover skillet, and reduce heat to low.
  8. Simmer chops until tender, 30 to 35 minutes, turning once halfway through cooking.
  9. Transfer chops to a serving platter.
  10. Whisk cornstarch and water in a small bowl until smooth; stir into pan juices and simmer until thickened, about 5 minutes.
  11. Pour sauce over chops to serve.


We like to double the sauce, so there is plenty for our noodles.

Adapted from Allrecipes.com

GREEN CHILI PORK ENCHILADAS

yield:  8 SERVINGS  prep time: 30 MINUTES  bake  time: 20 MINUTES   total time: 50 MINUTES

INGREDIENTS:

  • 1 lb Rural Roots Ranch ground pork
  • 3 cups (12 ounces) shredded Mexican Blend Cheese
  • 1/2 cup chopped Onion or Green Onion
  • 1 can (19 oz) Green Chili Enchilada Sauce
  • 8 flour tortillas
  • ¾ cup Sour Cream
  • 1 can (4.5 oz) Chopped Green Chilies
  • 1 can (16 oz) refried beans
  • Sliced Green Onion (For Garnish)
  • Sliced Black Olives (For Garnish)

DIRECTIONS:

  1. Brown pork in a skillet over medium heat.
  2. In a medium bowl, combine pork, 2 cups cheese, green chilies, refried beans and onions.
  3. In a small skillet, bring enchilada sauce to a boil, remove from heat.
  4. Dip each tortilla into heated sauce briefly to soften.
  5. Spoon ⅓ cup of the pork mixture and 2 tablespoons of sour cream down the center of each tortilla.
  6. Roll and place tortillas seam-side down in a 12″ x 8″ inch baking dish.
  7. Pour remaining enchilada sauce over top.
  8. Sprinkle with remaining 1 cup cheese, sliced green onions and olives.
  9. Bake 20 minutes at 350º until bubbly.

Our family tends to find ½ of an enchilada plenty filling.  So I make the enchiladas in two 9×9 pans placing 4 of the tortilla rolls in each. 

We serve one for dinner and put the other in the freezer after it has cooled for a quick dinner on busy nights.

Adapted from Familycookbook.com

And you can’t forget something for a sweet tooth!

My kids have made this Chocolate Chip Cookie recipe SO many times, they have it memorized.

CHOCOLATE CHIP COOKIES

yield:  3 DOZEN  prep time: 15 MINUTES  bake  time: 45 MINUTES   total time: 1 HOUR

INGREDIENTS:

  • 1 ½ cups butter, softened
  • 1 cup sugar
  • 1 cup brown sugar, packed
  • 2 eggs
  • 2 teaspoons vanilla
  • 3 ¼ cups flour
  • 1 teaspoon baking soda
  • 1 teaspoon salt
  • 1 (12 oz) packaged of Nestle Semi-Sweet Chocolate Chips

DIRECTIONS:

  1. Preheat your oven to 375 degrees F.
  2. With a stand mixer, cream together butter and sugars.
  3. Add eggs and vanilla.
  4. Add remaining ingredients except for chocolate chips and mix well.
  5. Add chocolate chips and stir just until combined.
  6. Drop dough by rounded teaspoonfuls 2 inches apart onto ungreased baking sheets.
  7. Bake 8 to 12 minutes or until light brown. It will vary depending on your oven.
  8. Cool slightly before removing from baking sheet.
  9. ENJOY!

Adapted from Betty Crocker

Did you try one of our recipes?  What’d you think of it?

Let me know!

NEED MORE GREAT RECIPES?

Have you been sniffing around the internet looking for a few new recipes to try on your family?

Share your email below and you’ll receive some of our family’s favorites every month.

Processing…
Success! You'll soon be receiving some of our favorite recipes.

How Much Freezer Space Do I Need For My Pastured Pork?

Have you been considering one of our boxed pastured pork shares or a custom whole or half, but not sure if you’ll have enough freezer space to store it?

I’ve found myself standing with the freezer door open trying to calculate mentally in my head how much space I have.

Maybe if I move this meat over here, and stuff these veggies in the door, ewww…and that looks like it could be thrown out, I could make more room.

I bet I’d find a lot more room too, if I’d take the time to defrost my freezer.  It’s amazing how quickly the ice seems to build up.

About 33% of us have an additional freezer at home.

But whether you have a top freezer on your fridge or three stashed in the garage, we’ll help you calculate your space.

Here’s a quick little breakdown on how much space you’ll need for our different sized pork shares, and how to measure your freezer.

PASTURED PORK SHARE

1/8 ~ 15 lbs
1/4 ~ 35 lbs
1/2 ~ 70 lbs
Whole ~ 140 lbs

FREEZER SPACE NEEDED

1 cu. ft.
2 cu. ft.
3 – 4 cu. ft.
6 – 7 cu. ft.

If you do not know the size of your freezer or how much space you have available, follow the steps below to calculate it.

Don’t get nervous if you don’t like math.  I’ll try to keep this simple.

Now would be a good time to defrost that freezer if you haven’t done it in awhile.

It usually takes less than 24 hours.

We place all our food in coolers and try to keep them in the coolest place of the house.

Unplug the freezer and let it thaw.

Wipe up the extra water with a towel, plug her in, and you’re good to go!

It’s best to let the freezer get back down to temperature before you start refilling it.

Don’t worry if you don’t have the time to defrost your freezer, you can still get a good idea of the space you have.

These steps are on how to measure your empty freezer, but let’s face it.  Unless you defrost your freezer, it’s not going to be empty.

And to be more accurate on the room you have, you’ll wanna leave your food in there and just measure the empty space.

5 Steps to Measure Your Freezer Space

1

2

3

4

5

Try to condense all your items into your freezer in as little space as you can or move to the side to take measurements.

Height: Measure inside the freezer from the bottom to the highest point it can be filled without obstructing the lid for a chest freezer, or to the top for an upright freezer.

Or the height of the area you have available.

Width: Measure inside the freezer from one inner wall across to the other. Record the number in feet.

Depth: Measure inside the freezer from the front wall, or door for an upright freezer, to the back inside wall. Record the number in feet.

Multiply the three numbers together. This will give you how many cubic feet you have to fill with pastured pork.

I sure hope that didn’t get your brain spinning in circles.  

I know I have to slow down and read through the steps a couple times slowly to make sure I understand myself.  LOL!

Go check out what Pastured Pork Share might be best for your family!

STAY IN TOUCH

We want to stay in touch!
And we love to share our farm stories, along with our favorite recipes.

Sign-up, so we can share with you!

Processing…
Yay! Welcome to the Rural Roots Ranch Family!

The Perfect Pig for Our Pastures

Awwwhhh…….what a cute little piggy!

Did you just get the image of a little pink piglet in your head?  Me too!! 

Rarely are our pigs pink.  I love all the variety of color that comes from the Idaho Pasture Pigs (IPP) we raise.

Never heard of an Idaho Pasture Pig?  Don’t worry, most people haven’t.

They are extremely friendly and docile.

The kids love spending time in the pig pen.  No, not their messy rooms!  LOL! 

Each and everyone has a unique personality and name.  Since the breed originated in Idaho, we started naming them from different places in Idaho.

Fuitland
Payette
Cali

But as our herd grew, and we traveled farther to get new lines, we started naming them after the places they were born.

Another aspect we love about our IPP’s is they have great mothering qualities. They farrow, usually unassisted, in their huts.

Sow with litter in A-frame Hut.

As a kid we raised pigs.  When they farrowed we put them in crates to keep the babies safe until they were old enough and learned to stay out of the way.

Their A-frame hut acts like a farrowing crate protecting the pigs on the sides, but allows Mom and piglets to come and go as they please.

This allows them to be outdoors in fresh air as animals were intended and not in confinement.

There is a time and a place for confinement, but we try to avoid it as much as possible.

In the spring and fall, our place can get pretty busy.  Including boars, sows, feeders and piglets, we currently have 74 pigs wandering different pastures and farrowing pens on the place.

They love to graze on green pastures. While their diet can’t solely consist of grasses, they do well on very little grain as compared to a commercial hog.

Their short upturned nose is an ideal trait for grazing.

People chuckle at them and think they look odd, but I’ve been raising them long enough now that I think commercial hogs look like anteaters with their long noses.

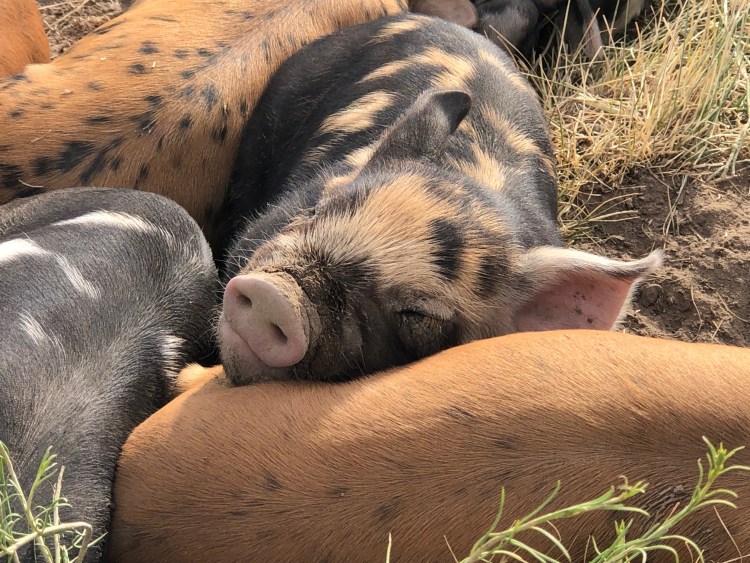
It’s not uncommon on a warm day to see a pile of pigs or piglets basking in the sunshine.  Some of them even appear to be smiling.

Being out in the sunshine, eating and roaming the pastures, allows for them to create pork that is packed full of nutrients.

I think it’s the best pork, I’ve ever eaten.  Some of our customers have commented it’s more like beef than the pork they’re used to, but with a pork flavor.

If you’re ever out our way, we love visitors to the farm.  

Give us a holler.  We’d be happy to introduce you personally to the pigs and other critters on the farm.

In the meantime, sign-up to receive our emails.

Each month we will be introducing a different species we have on the farm.

SIGN-UP TO MEET MORE FARM ANIMALS!

Do you want to know what’s happening on the farm?

Receive delicious recipes? Baby animal pictures?

Sign-up to receive our emails!

Processing…
Success! You're on the list.

The Most Moist, Tender & Delicious Ham with these TIPS!

Mmmmm.. the smell of ham and fresh baked rolls drifts throughout the house.  Your mouth waters as you pass the cheesecake you made for dessert sitting on the counter as you head to the oven to check on your ham.

Ughh!  You’ve spent all day prepping and cooking for your Easter meal to find out your ham is dry and chewy when you pull it out of the oven.

I’m here to help you create the most moist, tender and delicious ham ever!

First off, what type of ham are you going to cook?  You’ve got a few options.  

Typically if you purchase a ham from the grocery store it will be precooked, and simply requires reheating.  

When you purchase your ham from the butcher or your local farmer, it may or may not be cured/smoked or precooked.

If your ham is fresh, you’ll just have to make sure you get the meat temperature up to 145 degrees F to be fully cooked.

So, do you want boneless or bone-in?  Here are a few pros about each.

Bone-less: easy to carve
Serving size: ½ lb per person

Bone-In: better flavor & juicier meat, leftover bone to make soup
Serving size: ¾ to 1 lb per person

Spiral-cut: already sliced, glaze can spread throughout the ham because of the slices, cooks a bit  faster.
Serving size: ¾ to 1 lb per person

8 NO FAIL TIPS FOR THE PERFECT HAM

  1. Thaw Your Ham

Make sure your ham is completely thawed.  1-hour prior to cooking, set it out and let it come to room temperature.  This will help keep your ham tender and juicy.

Diamond shaped scoring on ham.
  1. Score the Skin

Making a diamond pattern, use a sharp knife to cut through the fat and skin layer of the ham.  Not only does this make your ham look professional and beautiful, it allows the glaze to seep down into the meat.

  1. Glaze Your Ham

Get creative and glaze your ham! Mix up the ingredients of your glaze while your ham’s cooking. When you’re down to the last hour of cooking, brush your ham with the glaze every 15 minutes or so.

  1. Cover Your Ham

Always keep your ham covered whether it’s with aluminum foil or a lid if you’re using a deep dish.  And, be sure to cover it back up everytime after you apply the glaze.

  1. Add Moisture to Your Ham

Add a cup of water, apple or pineapple juice to the bottom of your pan.  This will help to keep your ham moist and add flavor!

  1. Cooking Your Ham

Use a meat thermometer for best results. Insert the thermometer into the thickest part of the ham, but make sure you avoid the bone.  

Precooked Ham: 140 degrees F
Fresh Ham: 145 degrees F

Here’s a quick little table on how long to cook your ham!

Ham Roasting Guidelines
Bake at 325 degrees F
Slow Cooker on Low

Boneless Ham1 ½ to 2 lbs
3 to 4 lbs
6 to 8 lbs
9 to 11 lbs
45 min to 1 hour
1 to 1 ½ hours
1 ½ to 2 hrs 40 min
2 hrs 15 min to 2 hrs 50 min
Bone-In Ham6 to 8 lbs
14 to 16 lbs
1 ½ to 2 hrs 15 min
2 hrs 20 min to 4 hours
  1. Rest Your Ham

Allow your ham to rest covered for at least 15 minutes when you pull it out of the oven before you start carving it.  This gives the ham time to reabsorb much of the juices back through the meat.

  1. Carving Your Ham

Boneless ham: Simply carve away with a sharp knife.

Bone-in ham: perpendicular to the bone, cut the ham into thin slices.  Then, cut along the bone to release the slices.

Whether you are feeding a crowd or enjoying a ham steak for just the two of you, follow these simple tips and we know you will not be disappointed!

Check out our favorite Easter Ham Recipe below!

I want to hear how great your ham was! 

Email me and let me know!

MOUTHWATERING SWEET & SPICY HAM

yield:  18 SERVINGS  prep time: 15 MINUTES  bake  time: 2 ¾ HOURS   total time: 3 HOURS

INGREDIENTS:

  • ¾ cup packed brown sugar
  • ¾ cup orange marmalade
  • ½ cup Dijon mustard
  • 1 ½ teaspoons whole cloves
  • 1- 6 to 8 lb Rural Roots Ranch
  • precooked bone-in ham
  • 1 cup water
Courtesy of Taste of Home

DIRECTIONS:

  1. Preheat your oven to 325 degrees F.
  2. Combine the brown sugar, marmalade, and mustard in a small bowl. Set aside. 
  3. Score the surface of the ham, making diamond shapes ½ inch deep.
  4. Insert a whole clove in the center of each diamond.
  5. Place ham in a shallow roasting pan.
  6. Add 1 cup of water to the bottom of the roasting pan.
  7. Cover with aluminum foil.
  8. Bake until your ham reaches a temperature of 140 degrees F, about 2 hours.
  9. Brush ham with some of the glaze.  Continue to bake your ham for 45 minutes, brushing with the glaze every 15 minutes.  Don’t forget to recover your ham after each glazing.
  10. When ham is done, allow to rest, covered for 15 minutes before carving.
  11. Carve.
  12. ENJOY!

Adapted from Taste of Home

DON’T MISS OUT!

I want you to enjoy many more recipes we love on our farm!
Sign up below, so we can keep you in the loop!

Processing…
Success! You're on the list.

Just How Many Meals CAN You Get From 1/2 a Pig?

Have you ever thought, my husband and I couldn’t possibly eat ½ a pastured pig in a year? 

When you sit down to do a little math….oh, but wait!  Let me do that for you!  You’ll be surprised at how much pork you really do eat in a year.

So…let me break it down for you without getting too complicated.

The average American eats about 52 lbs of pork a year. Mostly in the form of bacon.

Mmmm…bacon.  I have lots of bacon lovers in my family.  And who wouldn’t love more bacon?!

Okay… got a little side tracked there on the bacon.

52 lbs a year for you is only 1lb of pork a week.  Add in your husband’s share and that’s 104 lbs of bacon, oh, I mean, pork a year.

I bet now you’re thinking,

So how much meat DO you get from a ½ a pig?

+/- 65 lbs.
OR
8 months supply of pasture pork

Now, if you’re a carnivore like me, I can tell you now, that you’re going to consume your pork a little faster.  But if you eat your meat more like you’d add a condiment to your salad, it’ll last you considerably longer.

Carnivore Portion
8 oz

Condiment Portion
2 oz

More than likely you have one of each in your household.  Which gives you the option of about 104 meals for you and your husband.

At two meals a week, ½ a pastured pork share could last you up to 1 year.

104 meals!  Yah, sure, only 104 MEALS!!  How am I going to come up with enough different meals to not be sick and tired of pork by the end of the year? 

Well, I’ve got that covered too!

Let me help you out, by giving me your contact information below.

You’ll be notified when I post new recipes along with a future blog post on 104 meal ideas to help you eat through your ½ hog.

You and your husband should have no problem enjoying your great tasting pork before it starts to lose some of its freshness.

Sign-up now, so I can share some great recipes with you!

Processing…
Success! You're on the list. I look forward to helping you out with great recipes!

Are You as Agile and Fearless as this Farm Animal?

Ice Cream

Oh, to be as agile and fearless as a goat.

It makes sense to me why people would think goat yoga would be a good idea.  Now, I’m pretty sure it’s for the experience of being on the farm with the goats, but man, I want to be able to move like a goat!

Fun Fact: Did you know goat yoga originated in Oregon?

Goats are some of the most amazingly talented animals in the ways of movement and balance.

I used to secretly snicker to myself when people complained about turning 40. “Just wait,” they’d say. “When you turn 40, overnight you’re going to feel like you’ve aged 10 years. You’ll have aches and pains you never knew you had!”

Yah…suuuurrre.  But let me tell you!  They weren’t joking.

Last year, I turned 40. And while I’m not old, it definitely has me looking at my health and body in a new light.

It’s amazing how those little accidents you had as a kid such as, playing sports, getting dumped off a horse, or thinking just this one time, it’ll be okay to ride the hay truck back to the house, even though you’ve been told what seems like millions of time by your parents not to, and the load decides to come of the truck with you in it (Yep, that was me) comes back to visit you.

Maybe I need to take up goat yoga!

Roxie, Christmas, Silver Bells, Samson & Samantha

The other day, when I was putting a bale of hay in for them, the babies thought it would be fun to tightrope walk on the twine that ties the bale together.

The twine is only ⅜ of an inch wide.

Yet, there they are, confident as can be and having a grand time.

It reminded me of the image I’ve seen across the internet of the goat on the rock cliff.  I’m sure you’ve all seen it.  No idea how he got there or how it will get down, but fearless!

I’m sure that goat never had a doubt in his mind that he couldn’t do it.  There’s been many times I would have loved to have mustered up a little of his courage.

I definitely could use a little of his courage and determination to stick to an exercise routine.  I don’t know about you, but this is something I really struggle at.

Goats also have some of the best personalities.

We have goats that like to smile, maaa back to you when you talk to them, give you the eye, LOL.

But let me tell you, they can also be a real pain in the butt.  Their fearlessness and agility makes it real hard at times to keep them in their pens. 

And when they get out, they get into everything they’re not supposed to. Kinda like a toddler who figured out how to open the pantry door and get into the bag of flour.

Our son got his first three goats as bottle babies from his Aunt, and his herd has grown from there.  Bottle babies know no boundaries because they think they are one of us.

I love watching them follow him around the pen, just as they did when they were babies.  Now, with their babies trailing behind them.

So while most people might think of a cat when it comes to being agile or a honey badger when it comes to being fearless: I think of a goat. 

What’s a quality you admire in a species of animal?

Comment or send me an email.  I’d love to hear from you!

Don’t miss out!

We want you to be part of our farm family!

Sign up to receive weekly emails to hear what’s happening on the farm, great recipes to try, and when our products will be available.

Processing…
Success! You're on the list.
Sundae & Samantha
Francine
Roxie